|
REVIEW: CH Products Flight Sim Yoke USB and Pro Pedals USB
CH Products Flight Sim Yoke USB Review
FIGURE 1. INSTALLATION for XP? Just plug it in!
INSTALLATION: For Windows XP, just plug it in! The Ch Products Flight Sim Yoke box included the yoke, a concise installation guide, and a CD. The CD was a bit outdated, but all the latest software is available for download from the CH Products website (www.chproducts.com). It included CH Products' Control Manager software 2.1 (the current version on their website is 3.x) and Direct-X 8.1 (current version at the time of this writing was 9.0b). There were drivers for all CH Products devices and several input device utilities. The CD also included a link back to CH Product's for tech support and several demonstration programs, including 4 x 4 Evolution, Delta Force Land Warrior, F-16/MiG-29, and On Top (IFR Flight Simulator).
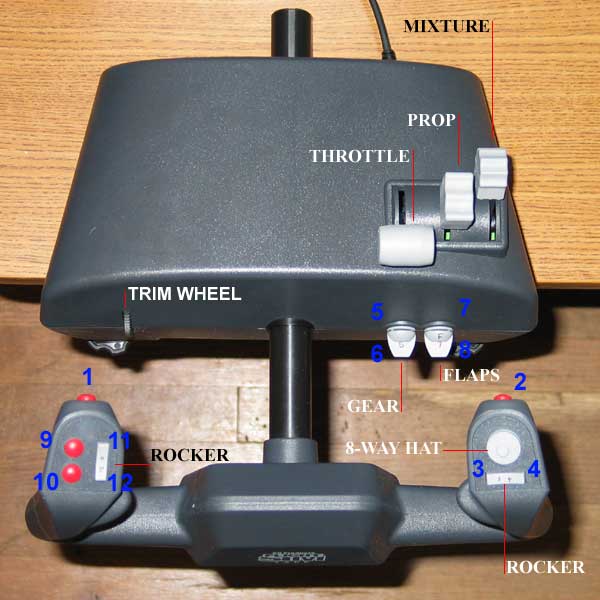
FIGURE 2: CH PRODUCTS FLIGHT SIM YOKE: TOP VIEW WITH LABELS
BUTTON CONFIGURATION: Figure 2 shows a top view of the yoke with everything labeled. I've read that there are everything from 12-20 buttons on this yoke. There are actually 20 buttons in all, and these are numbered in the photo according to their corresponding button number in the Windows joystick calibration box (very helpful when remapping buttons to various games). There are 4 standard buttons (buttons 1, 2, 9, 10), two momentary rocker switches that pop back to neutral when you take off your finger (11, 12 and 3, 4), two momentary toggle switches (5, 6 for gear switch and 7, 8 for flaps; buttons 5 and 7 activate when you pull up on each switch, 6 and 8 when you push down), and the 8-button hat switch (buttons 13-20, although the numbers for these don't show up in the Microsoft calibration screen). The yoke has 5 axes, which enables inputs for throttle, prop, and mixture control in addition to the standard pitch and role. There is a trim wheel on the left side for fine x-axis (elevator/pitch) adjustments.
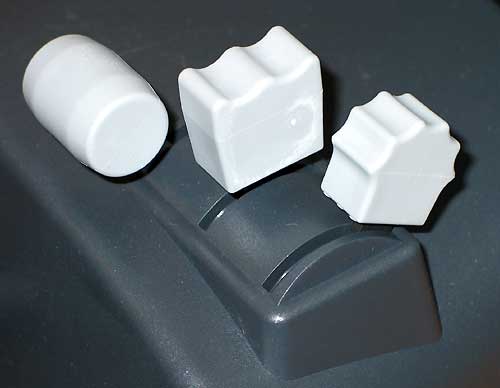
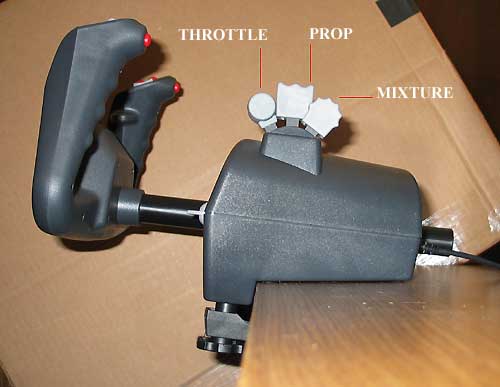
FIGURE 3: THROTTLE, PROPELLER, AND MIXTURE LEVERS
These controls were extremely smooth and rock solid on calibration.
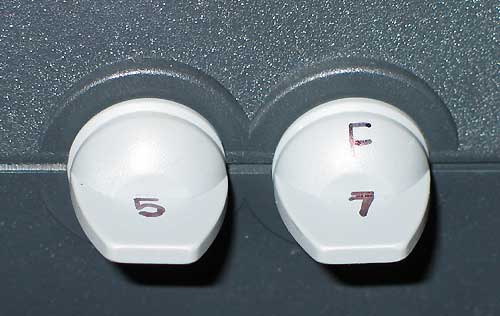
FIGURE 4: GEAR SWITCH ON LEFT, FLAP SWITCH ON RIGHT
The gear and flap switches have surprisingly short travel, about 1/16 of an inch up and down. They have a slight "click", which provides both tactile and audible feedback, letting you know you have clicked the button. These are temporary buttons that move back to the neutral position when you let go.
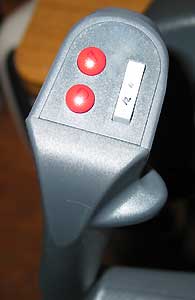
FIGURE 5: LEFT AND RIGHT YOKE HANDLES WITH BUTTONS
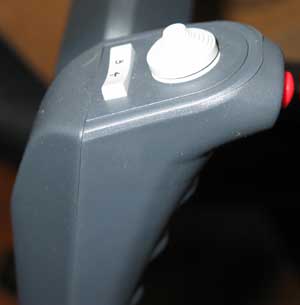
The red buttons are typical Ch Products, a nice click that you can hear and feel. The rocker switches are new to me. The motion is similar to the gear and flap switches, moving back to neutral when you let go. Very nice for trimming the plane, although I use the right one for changing views in Flight Simulator (cockpit, tower, chase plane, etc., and for instantly resetting my view to the front after panning).
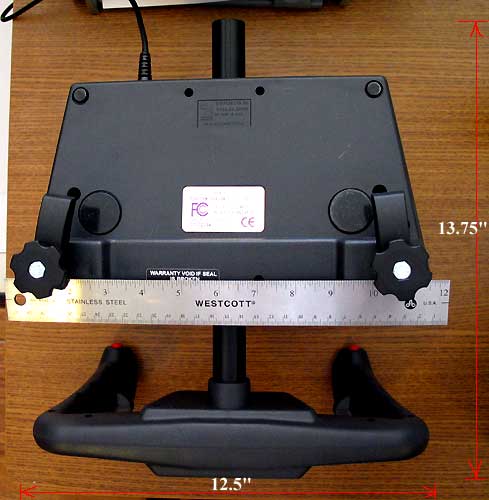
FIGURE 6: BOTTOM VIEW OF YOKE
I kept seeing different specifications on how big the entire yoke was, so I measured it. The yoke is about 12 inches wide and about 13 3/4 inches deep when the yoke is in neutral. The distance from the front of the desk to the back of the control rod is 6 1/2 inches in neutral. The travel for the yoke is plus and minus 1 1/2 inches, so you actually need 8 inches of space from the edge of your desk to the back of the yoke for operation, not the 6 inches as is specified in some other reviews. Note the rubber pads to help secure the yoke on the desk.
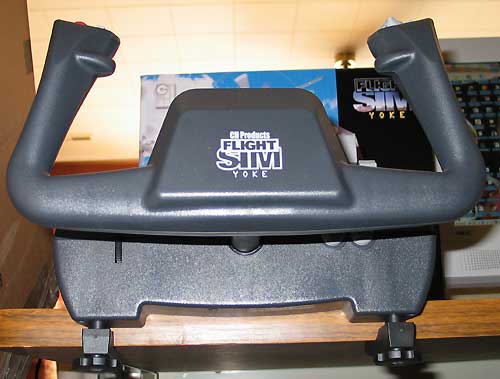
FIGURE 7: FRONT VIEW OF YOKE
The yoke handle measures 12 wide by 6 1/2 inches high. Note that there is a very nicely angled flat area at the top, center of the yoke, a great place for a stopwatch. The trim wheel is visible on the left, and the gear and flaps buttons partially visible on the right. The top of the yoke is 7 1/4 inches from the top of the desk in the neutral position and about 9 3/4 inches when deflected left or right.
FIGURE 8: YOKE SIDE VIEW
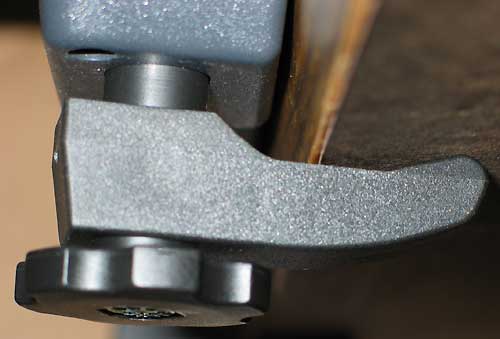
CLAMPING: Figure 8 shows the yoke mounted on my desk, which is about 1 inch thick. The clamp screws are very smooth and grip quite well with little pressure. The underside of the yoke has rubber pads that help it stick to the desk. In other reviews I saw many different values for clamping range, so I measured for myself. This unit will clamp onto desks that range in thickness from just under 1 inch to 2 1/4 inches.
FIGURE 9: THE EXCELLENT CLAMPS IN ACTION
The clamps are tough plastic and hold quite well. The grip extends under the desk 1 1/8 inches.
OPERATION: I used the CH Products Flight Sim Yoke with Microsoft Flight Simulator 2004 A Century of Flight. Flight Simulator immediately recognized the yoke at startup and already had all the buttons mapped. I changed them to my preferences using the setup panel in FS. On my first flight I noticed that the elevator was really jumping around. It wouldn't stay where I put it! I really thought the yoke was broken. Then a very distant memory began to emerge from my checkered past. I recalled that I still had my old Gameport joystick plugged in...problem solved. These USB devices do not work with Gameport devices.
The yoke felt very much like the Cessna's that I fly, albeit a bit lighter weight. The resistance was a little surprising, very stiff, which is good for cross country flying. It took a little getting used to the button locations, especially the hat switch, but after a few hours it falls right into my grasp. Having an 8-position hat switch sure makes the landing pattern easier to fly, and with all the buttons on the yoke I don't need to touch the keyboard. The trim wheel was very stiff, so I wouldn't use it to trim the airplane, just to adjust the joystick centering during calibration.
SELF CENTERING OR NOT??? I was concerned about the lack of center detent when I initially read the literature. But this doesn't mean the joystick doesn't self-center. It snaps back to center with about 1/4 inches of center play, just like in a real airplane.
FINAL OPINION: GREAT YOKE!
Copyright: Mike Stiteler, 2004
|

